How to Set Up a Rod Pod and Bite Alarms
My interest in rod pods started with a setup I wasn't happy with. I was bait fishing for trout at Jindabyne and Eucumbene, resting the rod on a forked stick and trying to keep the reel out of the dirt. It cost me at least one good fish. There had to be a better way.
When I first got a rod pod in, I thought it might be a bit gimmicky and probably unsuited to Aussie conditions. I couldn't have been more wrong.
The first trial was on a wharf at Karuah. It kept the rods and reels clear of interference, although the chopper tailor shredded our oyster baits. We moved to a private pond with bass and silver perch. On that steep bank, the reels stayed out of the dirt and the tips cleared the reeds. A bass took a live yabby and the alarm shrieked like a banshee. That got my attention.
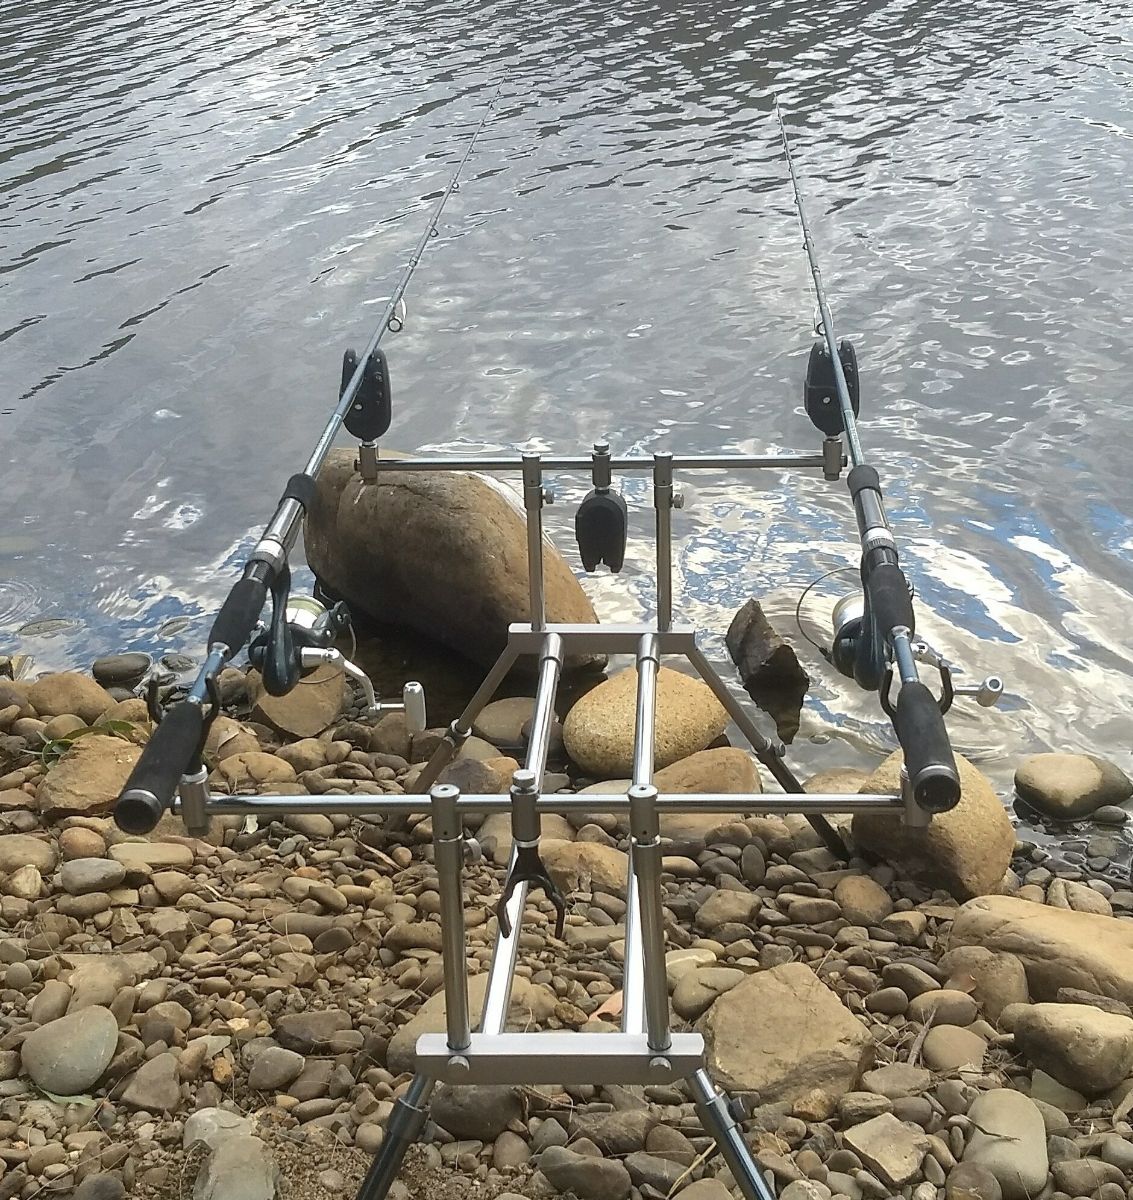
The useful part is simple: keep the tackle clear of mud, stones and duck poo, give the reel handle room to turn, and detect line moving before the rod is hauled off its support. Here's how to put it together.
1. Open the case and fit the legs
Choose firm ground with space to lift the rod and bring a fish to the net. Leave the path behind you clear.
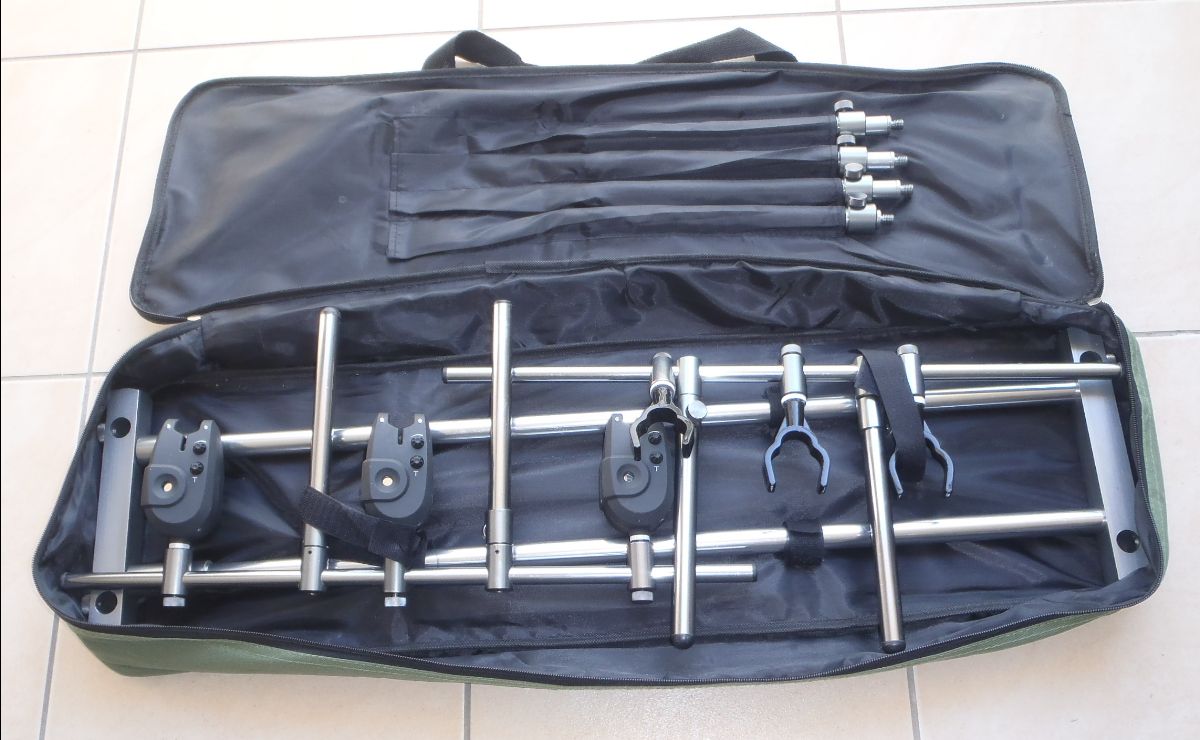
Open the zip bag. The four legs sit in sleeves, while straps hold the frame and crossbars in place.
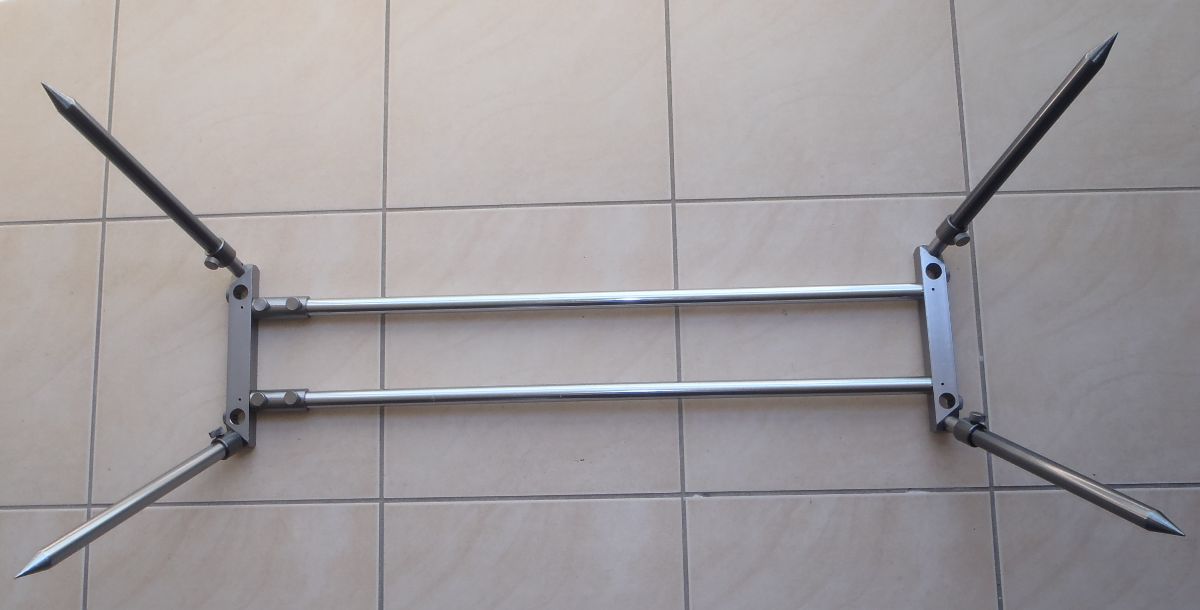
Lay the frame upside down and screw a leg into each corner. Start each thread squarely, tighten it by hand and then turn the frame onto its feet.
2. Fit the rests and alarm bar
The rear bar carries the forked rod rests. The front bar carries the bite alarms. Insert and secure both bars, then line up each rear rest with its alarm.
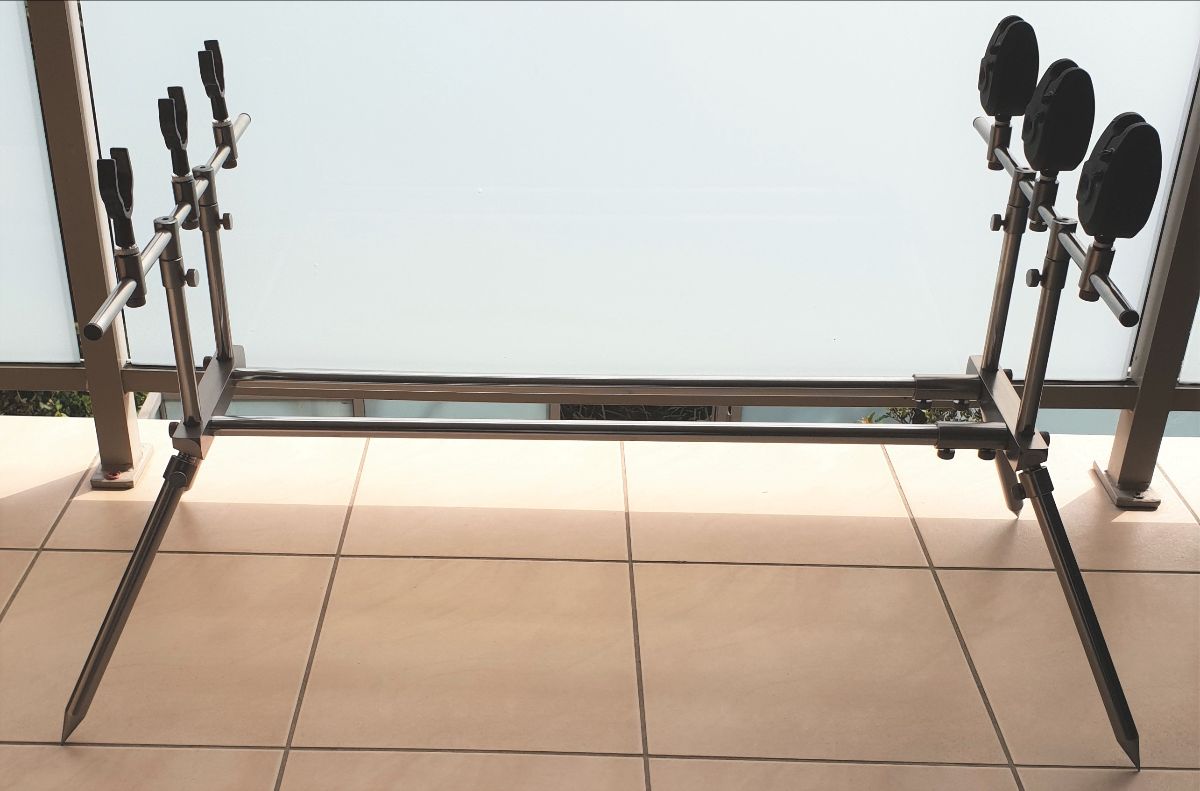
Put a rod on the frame while you make the final adjustments. Its butt should sit securely in the rear rest, with the rod supported at the front. Adjust the spacing so the reel hangs clear and its handle can turn without hitting the frame or the next outfit. Tighten the fittings once everything is lined up.
3. Adjust each foot to the bank
All four legs adjust separately. Extend them to suit the slope and settle each foot on firm ground. Give the frame a gentle check for rocking before adding the other rods.

I used reel boxes in that demonstration to show how much the legs can compensate for different heights. At the water, adjust the legs to the ground itself. Loose packing under a foot is another thing that can move when a fish takes off.
4. Put the line on the roller
The rod rests in the front alarm, but it is the fishing line moving over the roller that triggers the buzzer and light. The line goes between the two ears at the top of the alarm, onto the small roller at the bottom of that gap.
If the line misses the roller, the outfit can look perfectly tidy while the alarm does nothing. Check each rod individually.

Before baiting and casting, secure the hook, switch the alarm on and gently draw a little line over the roller by hand. Check the sound and light, then adjust the volume so you can hear it from where you'll be sitting. Repeat for each alarm.
5. Let the reel give line
Once you have cast and placed the rod on the pod, back the drag off enough for line to leave the reel smoothly. Pull a little line by hand to check the reel gives line before the outfit starts to move.
An open bail arm is another option I've used when there is no wind. With wind about, loose line can spill off the spool, so a backed-off drag is often easier to manage.
The alarm tells you a fish is moving the line. It doesn't lock the rod to the frame. On a take, pick up the rod, bring the drag back to a suitable fighting setting and respond promptly. Don't leave the fish running just to give it time to swallow the bait.
For the sound and pace of a run, watch Rod Pod Carp Run or Carp Run at Tallowa Dam. Both are in Increase Your Odds With Rod Pods, along with the leg-adjustment demonstration.
A running rig still has to run
One problem I described in Join the Rod Pod Squad was a little ball or bug sinker burying itself in soft mud. The line was supposed to run through it, but the rig had effectively become an anchor.
My alternative was a lead weight with a swivel moulded into it. The large eye gave the line a clearer path to run through. Check the rig as well as the rod support: mud, weed or a tangled trace can defeat a good alarm setup.
That report also links to Rod Pods for Aussie Carp, a light-line session. For bait and fishing method, see our Sydney carp guide.
More than a carp accessory
I've used a pod for calm-water blackfish fishing, with floats streaming in the tidal run, and for squid off a wharf. Keeping the tackle up off the deck is useful before a buzzer ever sounds.
Our current rod pod and bite-alarm set has an aluminium frame with positions for up to three outfits, three alarms with adjustable tone and volume, flashing LEDs, batteries and a zippered carry bag. The photographs here show earlier sets in use; use the supplied instructions for the controls on your alarms.
In general NSW freshwater, one angler can use two attended lines, kept within 50 m and in sight. Some trout waters have tighter line and bait restrictions, so check the current NSW freshwater methods. Three positions on a frame don't mean three freshwater lines per person. Stay with your rods and bring the lines in before leaving them.